
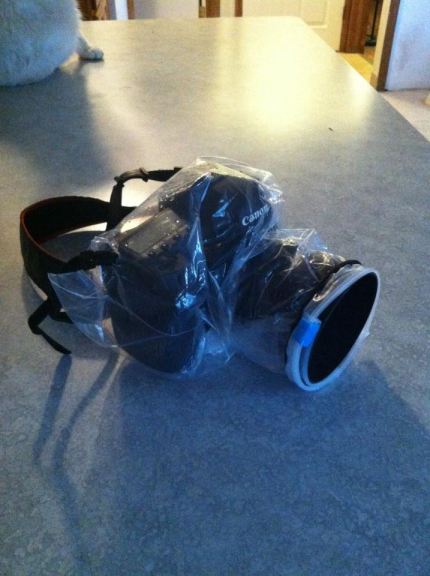
When I first started really getting into photography, the thought of underwater photos intrigued me. “How amazing it would be to capture images underwater,” I thought to myself. So I started researching exactly how one might go about putting their camera underwater, because lets be honest, this setup surely wasn’t going to do the trick (and yes, that’s one of my many beautiful cats lounging on my countertop).
But upon typing in my search inquiry, my heart sank. It looked as though there were two options: 1.) A camera bag and 2.) A housing facility. The camera bag, priced at the low end of the spectrum (roughly $100-$150), seemed to better fit my budget, but after reading the horrible reviews every bag received (“Hugely susceptible to human error”, “Leaked the first time I tried it in my bathtub”, “Leaks if placed lower than 1′ of water”, “Leaks because it’s Tuesday” ) I decided against it. I needed something substantial that put one of my most valuable possessions in as little of harm’s way as possible.
So next I took a look at housings.
For a 5D Mark II, underwater housing starts at roughly $1500 and goes up from there. $1500? I was nowhere near being able to afford $1500! I slammed my computer shut and thought to myself, “It’s okay. I just need to save up some money before I can start taking underwater photos. I can live with that.”
Except I couldn’t live with that. The thought burrowed into the back of my brain and wouldn’t leave. “Does this mean only people with $1500 lying around should be able to take underwater photos?” The more I was told I couldn’t take the pictures without proper equipment, the more I became obsessed with it. “There just had to be a way…”
And that way, I decided, was to make my own housing. I figured I could devise a structure that would allow me to put my camera inside, and I could use an automatic shutter release to take the photos from the outside. As long as all my settings were adjusted before I put the camera underwater…it was possible. So I figured it was time to build.
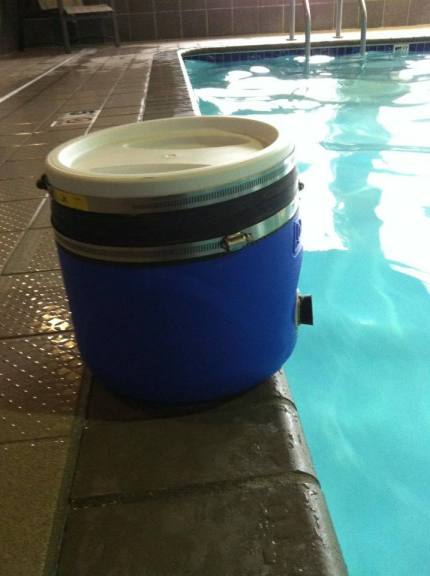
The first prototype was part of an insulated cooler. I needed to have a removable lid so I could take my camera in and out. I figured I’d cut the bottom out, replace it with Plexiglas and seal any spots where water could get in. Seemed simple enough, right?
Not even close. As soon as I reached a depth over 3′ deep the Plexiglas popped off the bottom like a dandelion head. Apparently I had completely underestimated the amount of water pressure I’d be dealing with here…
Some adjustments had to be made. Instead of sealing the Plexiglas on the inside of the container, I sealed it on the outside. By pushing the small disc against the contraption to which it was already attached, the water pressure was working with me instead of against me. There were still some issues with the lid leaking (as per the water-soaked dive weights inside), so I thought an extra dose of duct tape might do the trick for now.
How wrong could I be. The bottom seemed solid, but water was still rushing in from the top. Since I couldn’t find an O-ring large enough to fit inside, I tried everything else: thread tape, weather stripping, plenty of silicone and countless other options. Sealing from the inside certainly wasn’t going to do the trick.
So I opted for an outside option instead. We tried a variety of rubber options with a combination of pipe clamps. We even tried an old bike tire, but it turned out that it wasn’t even remotely waterproof (who would’ve thought?).
Plus, water was slowly leaking in through the Plexiglas window. Somehow, it was coming in through the lid, seeping down through the insulation and coming back out through the bottom. I needed to start from scratch.
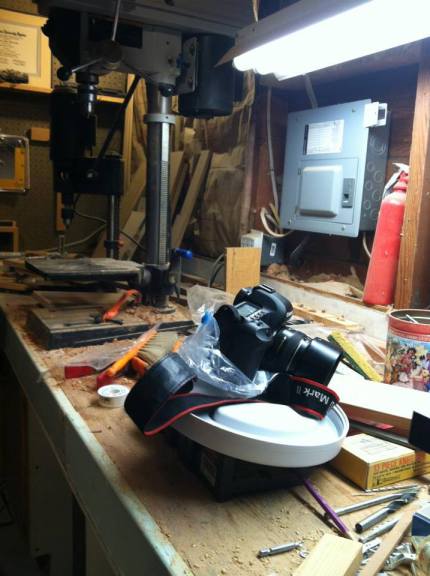
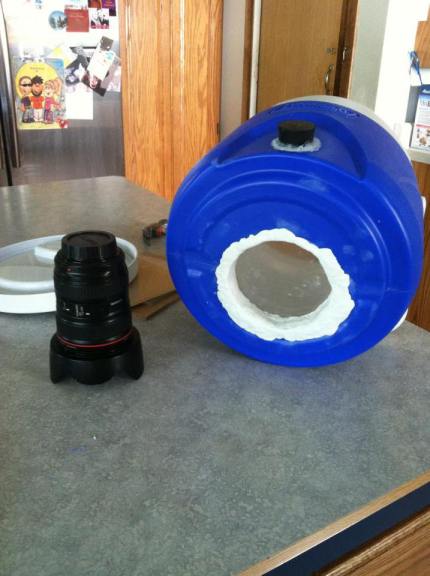
Instead of starting with something already built, I decided to design something myself. Since my camera measured a little more than 6″ across, I knew that would be my rough estimate of a sizing option.
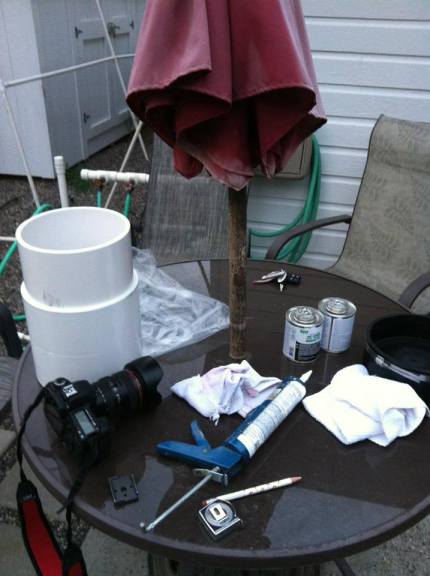
The available pipe options I had locally went from 6″ to 8.5″. I took a chunk of 8.5″ pipe, a chunk of coupling and sanded some Plexiglass to barely fit into the rim of the coupling. I sealed it, placed the pipe on top, sealed it with AVS glue and used a rubber pipe cap and pipe clamp as the lid. This had to work. It was just too pretty not to!
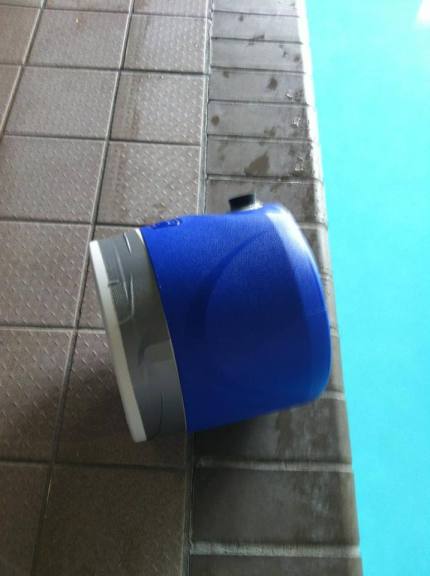
Off to the pool I went (thanks to the Comfort Inn for constantly letting me use their pool over the last few months!) hoping this would be the one.
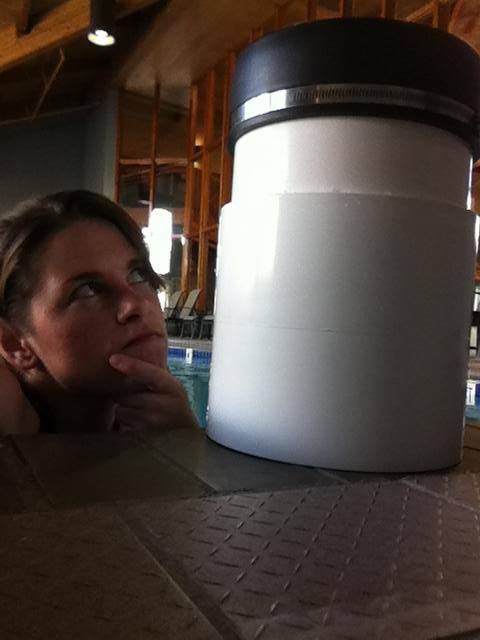
And the result?
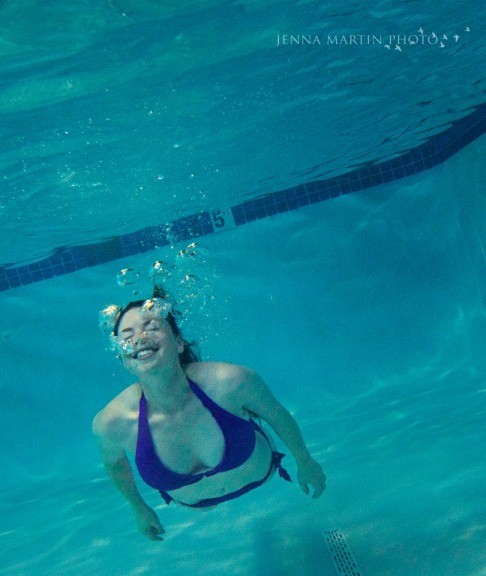
It worked! It worked, it worked, IT WORKED! Be sure to click here to see my first round of underwater photos!
Now to make a list of all the things I can put underwater ;).
Click here to subscribe and stay up to date on all underwater updates.


Kenneth McNay
I’m glad to see this option might be possible. I bought a scuba camera before a cruise and had some great snorkeling pictures. I’ve also used it in a pool. However, it can only handle shooting in .jpg, is merely 8MP, and has two lens options. That’s actually not bad. It takes some great pics underwater. In fact, it has a proprietary WB setting for underwater and has a different setting for open air shooting.
All that, and I totally want to use it more and more. Yet, just sometimes I pine for the high customization, high resolution, and additional lens choices of my DSLR. That’s not saying much; since, I use my 50mm and 85mm primes more than the two zooms I’ve got. I really, really, really love the results from the primes. (maybe I shouldn’t complain that my scuba camera has basically wide angle and wider angle, tee hee).
Anyway, thanks for the tips from this post. I’ll keep it in mind.
Jason O'Rourke
One thing to consider- the high end housings are very expensive, but UW photogs tend to upgrade often, even (especially?) at the hobbyist level. The cost of a 7-10 day dive trip in Indonesia could run 10-15k for a couple, so with creative math its easy to justify lots of parts.
End result – for an older, but still incredibly capable model like the 5D II – may be able to find that housing for a much lower price. My entry into UW DSRLs (after years of compacts) was in 2008. For $2100, I got a 20D, the 10-22mm WA lens, an Aquatica housing, and an 8″ dome port. It served me well for 7 years before I succumbed to the desire for something newer, smaller, better.
jennamartinphoto@gmail.com
Oh definitely. The housing I use now was right around that price. I use an Ikelite housing for a Mark III. Same port as well! I’m still loving it!